Whole-house planning
Planning a Whole-House Re-render in Sheffield, Stage by Stage
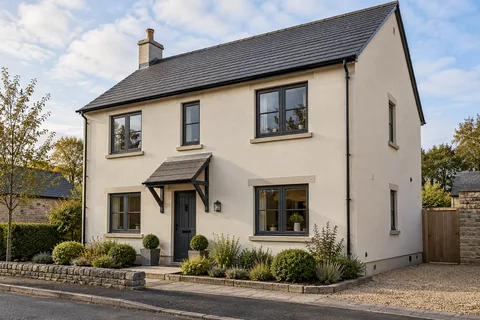
Re-rendering a whole house is one job with many moving parts: scaffold on every side, the old coat off, repairs to whatever turns up underneath, new coats built up wall by wall, then the pipes, lights and brackets put back. This guide follows that sequence for a Sheffield house, so you know what will physically happen to each elevation and which decisions have to be made before any render is mixed.

On this page
What a full re-render does to the house, in order
Most whole-house jobs follow the same physical order, whatever the material. Scaffold goes up around every elevation being treated, with extra lifts where the render runs up a gable apex or a chimney stack. Satellite dishes, alarm boxes, outside lights, hose reels and downpipes come off or are eased away from the wall so the new coats can run behind them. Glazing, doors, paving and borders are masked or boarded.
Next the walls are sounded. Tapping with a hammer handle picks out areas where the old render has parted from the masonry; a dull, drummy note across a large patch usually means that coat is coming off anyway. Failed render is hacked back to the masonry. K Rend's guidance for its own renders is that an existing layer is stripped back until there is a stable substrate and rendered out from there.
With the masonry exposed, the repair work begins: loose bricks or stones reset, open joints filled, cracked sills and failing lintels dealt with, and deep hollows dubbed out so the base coat can go on at an even thickness. Beads come next: a bell-cast bead at the base so the render stops clear of the damp-proof course and sheds water outwards, angle beads on external corners, and stop beads wherever render meets retained brick, stone or a frame.
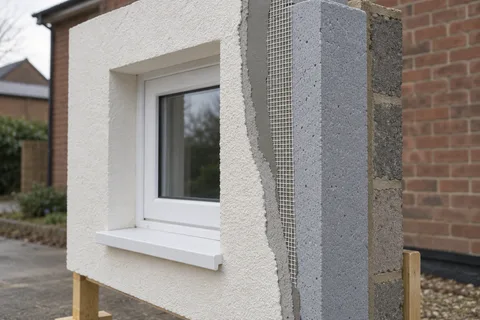
Then the coats. On a typical through-coloured silicone system the base coat goes on first with glass-fibre mesh embedded in it; K Rend gives its HP14 base a nominal 4-6 mm. After curing, a primer is applied and the thin silicone finish is floated on to the thickness of its largest grain. Once the finish has hardened, fittings go back, the masking comes off and the scaffold is struck.

Scaffold every treated elevation and take fittings off the wall.
Sound each wall and mark hollow, cracked and sound areas.
Strip failed render back to a stable background.
Repair masonry, dub out hollows and fix beads clear of the DPC.
Apply base coat with mesh, then primer, then finish.
Refit fittings on stainless brackets and strike the scaffold.
Survey all four sides, not only the street front
A survey for a whole house should look at every elevation at close range, including the back of an outrigger, a narrow side passage and the gable above a neighbour's roof. An exposed gable that catches wind-driven rain behaves differently from a sheltered front, and a rear wall shaded by trees stays damp long enough for algae to take hold.
Ask for the findings to be marked on a sketch of each elevation: hollow areas, cracks and the direction they run, staining under sills, render carried down over the damp-proof course, and paths or patios that have crept up the wall. Lime Green's preparation guidance for its renders asks for at least 150 mm between the base of the render and the ground, a gap that a raised path or patio can easily close.
Cracks need a cause before they need filling. K Rend's maintenance notes separate structural cracks, settlement or shrinkage cracks, stress cracks from the corners of openings and hairline crazing, and advise finding the cause and generally letting movement settle before repair. The survey should also say what the walls are built of. SPAB explains that rigid cement render on older solid walls restricts evaporation and traps water once it cracks, so a stone house may need a lime system, which Cornish Lime describes as three coats with about a week between each.
Permissions and Part L come before the colour card
Two sets of rules can change what you may put on a whole house. The first is planning. Under the householder permitted development rules (GPDO Schedule 2, Part 1, Class A, paragraph A.2(a)), cladding any part of the outside of a house with render, pebble dash, stone, timber, plastic or tiles is not permitted development on article 2(3) land, which includes conservation areas and National Parks. Sheffield City Council lists the High and Low Bradfield, Upper Midhope and Langsett conservation areas as Peak Park areas planned by the National Park Authority, so the office to ask depends on the address.
The second is Building Regulations. Approved Document L counts rendering the external surface of a wall as renovating it, and when render is stripped the element is the whole elevation in which that wall sits. If more than half of an element is renovated, the guidance expects that element to reach a U-value of 0.30 W/m²K; where that is not technically or functionally feasible, or would not pay back within 15 years, the best feasible improvement applies instead. Re-rendering every elevation passes that test on each wall, which is why external wall insulation often enters the conversation here.
The same document carries exceptions. Homes in conservation areas need not comply fully where it would unacceptably alter their character, traditional stone or lime-rendered walls should only be improved where that will not cause long-term deterioration, and building control should consider the conservation officer's advice. Talk to building control before the scaffold is booked, not when the old render is already in a skip.
Weather, curing gaps and the order of the elevations
Render is a wet material applied outdoors, and the calendar shapes a whole-house job more than any single wall. K Rend's FAQ says its renders should go on at 5°C and rising, not in very windy conditions, direct sunlight or damp. Its Silicone TC sheet adds that the finish must not go onto damp or frozen backgrounds, and that fresh work needs protecting from rain and from drying too fast. Netting or sheeting on the sunny or windward faces of the scaffold is part of the method.
Waiting times set the rhythm. In that system the base coat must be at least 14 days old before primer, and the primer needs 24 hours before the finish. A sensible programme staggers the house: base-coating the front and one side while the back is still being stripped, then coming round again with the finish. Each elevation should be finished in one run, because the same sheet asks for a wet edge and continuous surfaces finished without interruption. A day's stopping point belongs at a corner or a bead line, never across the middle of a wall.
Handover and the first few years
When the scaffold comes down, look at the places it hid: tie positions, the base of each wall and the first-floor reveals. K Rend's maintenance advice warns that ladders and scaffold can damage render and that rusting brackets stain it, so refitted fittings should use stainless fixings.
Through-coloured render is not meant to be painted. K Rend's FAQ says its render should simply be washed, since paint loses its water repellency and breathability, and its maintenance page suggests cleaning after a few years with a low-pressure fan nozzle, top to bottom, with a mild detergent and a biocide for algae. Keep product names, colour references and the survey sketches together for whoever drills the wall next. For the other services a whole-house job can involve, start from the Sheffield house rendering homepage.
Common questions
How long does a whole-house re-render take?
There is no honest single figure. It depends on how much old render comes off, what repairs appear underneath, the waiting times built into the chosen system, and how many days are lost to rain, frost or wind. Ask for a programme that shows those waits elevation by elevation.
Can the household stay in the house during the work?
Usually, yes. Expect scaffold across doors and windows, masked glazing at times, and noise and dust while the old render is hacked off. Agree which door stays usable and where waste is stored before work starts.
See housing and planning information for Sheffield and nearby places, including the source and geography behind each figure.