One elevation, whole-house plan
Wall Rendering Sheffield: One Elevation in a Whole-House Plan
Plenty of whole-house refurbishments are carried out one elevation at a time. The worst wall goes first, or the rear is done while the front waits for new windows. That works well if the first wall is planned as part of the finished house: the right system, a stopping line that the next stage can join cleanly, and records that tell the next renderer what is underneath.

On this page
Choosing which elevation goes first
The usual reason to start with one face is condition. In a typical Sheffield street the elevation that takes the weather, often a tall side gable, is the one where render cracks and hollows first, while a sheltered front may have years left. Fixing the failing wall first, then bringing the rest of the house to the same finish later, spreads the work without leaving the worst wall to deteriorate.
The other reason is sequence. If replacement windows, a new porch or an extension are planned for one side of the house, it rarely makes sense to render that side before the frames and openings are settled, because new reveals and sills would then be cut back into fresh render. Starting with an elevation that is not affected keeps finished work from being disturbed.
Decide the system for the whole house before the first wall is done, even if only one elevation is being rendered now. A silicone thin coat, a monocouche and a lime render look and weather differently, and changing system halfway round a house usually shows.
- Set the edges Decide where new render stops against brick, stone or an existing finish.
- Prepare the background Remove loose material, repair masonry and prepare suction and surface key. Existing paint needs a specified removal or alternative treatment.
- Base coat Built up to level the wall, with mesh where backgrounds change or crack.
- Finish Matched to the rest of the house or chosen as a deliberate contrast.
- Shed the water Copings, sills and the base bead keep rain off the top and away from the bottom edge.
The usual order of work. The survey and the chosen products decide the actual steps.
What happens to the first wall
The wall itself is treated exactly as it would be in a full job. The old render is sounded and hacked off where it is hollow or cracked, the masonry is repaired, and beads are fixed: a bell-cast bead over the damp-proof course, angle beads on the corners belonging to this stage and a stop bead wherever the new render ends against something that stays. The base coat goes on with glass-fibre mesh, which K Rend's product guide places at stress points such as the corners of openings, then the finish.
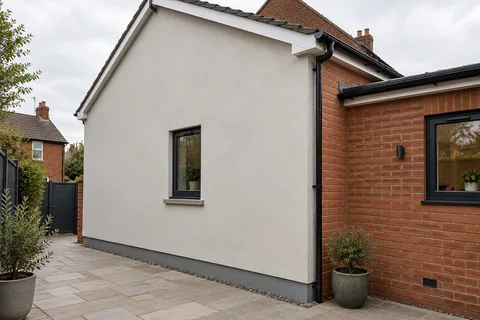
The stopping line deserves the most thought. External corners are the cleanest place to end a stage: an angle bead finishes the return neatly and the next stage can start on the adjoining face. Stopping partway along a wall leaves a visible joint. If a stage has to end there, a stop bead at a downpipe or a change in the wall line hides it better than a straight cut across open render.
Because the finish coat has to be worked to a wet edge, as K Rend's data sheet for its Silicone TC requires, the whole elevation in a stage is finished in one go. A tall gable needs enough scaffold lifts and hands to complete it in a single pass.
Fix the system for the whole house, then choose the first elevation.
Sound the wall and strip failed render back to sound masonry.
Repair masonry and fix beads, including stop beads at the stage boundary.
Apply base coat and mesh, then the finish, in one continuous pass across the face.
Record the system, colour and stopping details for the next stage.
Part L and planning for a single elevation
A single elevation can trigger Approved Document L on its own. The guidance treats rendering the outside of a wall as renovation, and Diagram 11.1 says that when external render is removed the area that counts is the elevation in which that wall sits. Re-rendering more than half of one elevation can therefore bring an expectation that the wall is insulated where that is technically, functionally and economically feasible. Building control decides, so raise it before the first stage is specified. If insulation will be added to the rest of the house later, the first wall should be planned to suit it, or it may have to be redone; see insulating a whole house.
In a conservation area or the Peak District National Park, cladding any part of a house with render is outside householder permitted development, so a first-stage wall needs the same planning check as the whole house.
Joining the next stage
A wall finished this year will have weathered by the time the next elevation is rendered. Fresh render beside weathered render of the same colour code often reads as a slightly different shade, which is another reason to put the joins at corners, where a change in light hides them. Wash the first wall as K Rend's maintenance advice describes, low pressure, fan nozzle, top to bottom, before judging the match.
Keep a short record for the next renderer: the products and colour, which areas were stripped and which kept, where the beads are and whether any masonry repairs were made. It turns the second stage into a continuation of the first rather than a fresh investigation. A whole-house re-render explains the full sequence once every elevation is due.
Common questions
Can one elevation be rendered now and the rest of the house later?
Yes, provided the system and colour are chosen for the whole house first and each stage ends at a sensible line, ideally an external corner. The later stage then joins it at the bead rather than across open render.
Will the second stage match the first?
The colour code will match; weathering may not. Expect fresh render to look slightly different from a wall that has had a few years of weather until both have aged.
See housing and planning information for Sheffield and nearby places, including the source and geography behind each figure.