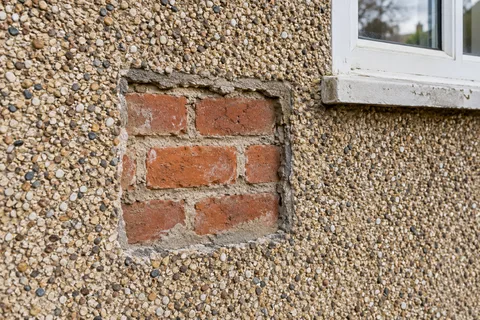
House-wide render repair
Render Repairs Sheffield: Repairing Across a Whole House
On a house with render on every side, repairs are rarely a single patch. A survey usually turns up hollow areas on the weather side, cracks from the corners of windows, a crumbling strip at the base and a few old patches that never matched. This page is about repairing a whole house's render in one go, and about the point at which repairing every elevation stops being better value than re-rendering it.

On this page
Surveying the whole house
Hollow render is found by sound. Tapping the surface gently gives a solid note where the render is bonded and a hollow, drummy one where it has parted from the wall or from the coat beneath. The Building Conservation Directory's guidance on lime render repairs describes tapping to trace the perimeter of a detached area and to tell whether it has come away between coats or from the masonry. On a whole house this is done from scaffold or a tower, and the findings are marked on each elevation so the repair areas are agreed before anything is cut out.
Cracks are recorded by type. K Rend's maintenance notes distinguish structural cracks, settlement or shrinkage cracks, stress cracks running from the corners of openings and surface hairline crazing, and advise finding the cause first and generally letting movement stabilise before repairing. A crack that is still opening is a building question, not a render one.
Look for the causes that make repairs recur: leaking gutters and downpipes, sills that drip onto the wall, and render carried down over the damp-proof course. Fixing those is part of a lasting repair.
- Map the damage Tapping finds hollow areas; cracks and their likely cause are noted.
- Cut back Failed render is cut out to a sound edge, usually squared off.
- Fix the cause Leaking gutters, sills without drips or render below the DPC are dealt with.
- Rebuild in coats Using a material compatible with the surrounding render and masonry.
- Blend the finish Texture is matched; colour may need a coating over the wider area.
The usual order of work. The survey and the chosen products decide the actual steps.
How each repair is made
A repair area is cut back to render that is sound when tapped, leaving a clean, firm edge for the new material to bond against. Loose material and dust come off the exposed masonry, the background is dampened or primed to even out its suction, and the repair is built up in coats that match the existing build-up: a cement base and finish on a modern render, a lime system on an old lime render. Cracks at window and door corners are a stress point, and K Rend's product guide places glass-fibre mesh in the base coat at these points to spread the stress.
Fine cracks and small holes in an otherwise sound coat need less. K Rend's Colour Fill is a ready-mixed exterior filler for minor cracks and holes, colour-matched to its renders. On a house where many small repairs are made, the finish will not match perfectly, which is why house-wide repairs are often followed by a coating over the whole of each repaired elevation; see recolouring the whole house.
Sound every elevation and mark hollow areas and cracks on a sketch of each face.
Find and fix the causes: gutters, sills, downpipes and the base of the wall.
Cut hollow areas back to a sound, firm edge.
Clean, dampen or prime the background, and repair any loose masonry.
Build the repair up in coats that match the existing render, with mesh at opening corners.
Fill fine cracks, then decide whether each elevation needs a unifying coat.
When repairing stops making sense
Repairs make sense while most of the render on each elevation is sound. Once sounding shows hollow areas joining up across a face, the work of cutting out and patching approaches the work of stripping it, without the benefit of a new, continuous system. At that point a re-render of that elevation, or of the whole house, is usually the better job; see re-rendering the whole house.
There is a regulatory line too. Approved Document L treats rendering a wall as renovation and sets a threshold of more than half of an individual element, which for external render means more than half of the elevation in which the wall sits. An isolated small repair may stay below that area test; several repairs and the wider renovation need to be assessed together. A major renovation exceeding a quarter of the external building envelope is the other test. Building control may then expect the element to be upgraded where feasible.
Older walls and aftercare
On an older stone or soft brick house, repairs should match the original material. SPAB explains that rigid cement on an older solid wall cracks and traps water, so cement patches in a lime render repeat the problem on a small scale, and the Building Conservation Directory advises that monitoring can be the first option for a stable hollow area on a historic render, with consolidation designed by an experienced conservator.
After the repairs, keep the marked-up elevation sketches. They show where the house has had trouble and make the next inspection quicker. K Rend's maintenance advice for the whole surface is gentle washing every few years and a biocide on damp, shaded walls.
Common questions
How do I know if the render is hollow?
Hollow render often shows as bulging, cracking or a patch that sounds drummy when tapped. The tapping itself, especially at height, belongs to whoever surveys the house from proper access.
Why does my repaired house look patchy?
Fresh repairs differ in colour and texture from weathered render. A coating over each repaired elevation is the usual way to even it out once the repairs have cured.
See housing and planning information for Sheffield and nearby places, including the source and geography behind each figure.